
What It Actually Takes to Get a Lead Campaign Live in HighLevel (9 Steps)
Most people think a campaign is the ads.
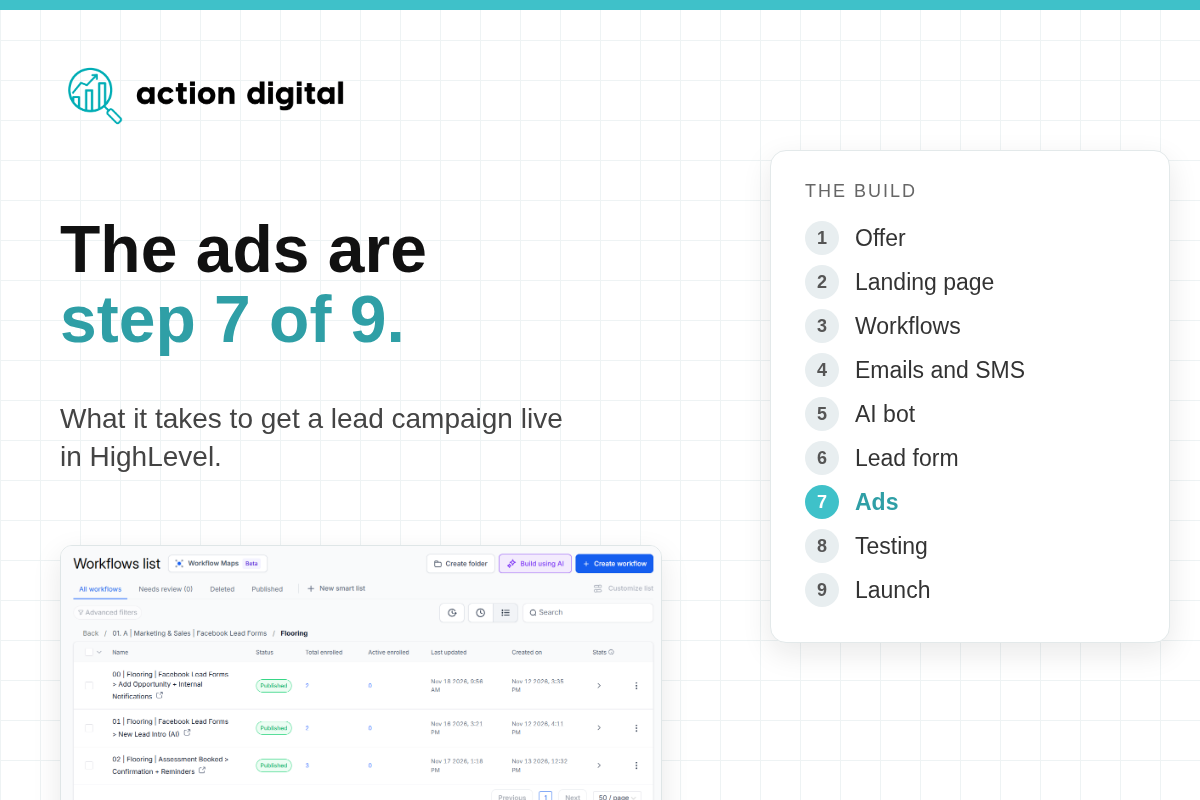
I've just finished building one for flooring businesses, start to finish, in HighLevel. The ads were step 7 of 9. Everything before them is what decides whether a lead turns into a booked call or disappears.
Here's the full build, in the order I'd do it again.
The short version
- The ads come late. Six things need to exist before you write one.
- Start with one offer and one action. Everything else hangs off it.
- The follow-up is the campaign. Workflows, messages and reminders do most of the work.
- Build the lead form before the workflow trigger, so the trigger can lock to it.
- Test in both places. A test lead can pass in Meta and still fail in HighLevel.
Step 1: The offer
Before any tool gets opened, four things need an answer.
- Who is it for? One niche. Ours is flooring businesses.
- What's the offer? A free 12-minute Lead Leakage Assessment, run by me on a video call.
- What's the one action? Book the assessment. Nothing else on the page competes with it.
- What's the method behind it? We named ours the L.E.A.D.S. Method: Locate, Establish, Automate, Deploy, Sharpen.
We also wrote down the pain, the promise and the agenda for the call. That one document fed every page, email and ad that came after it.
Step 2: The landing page
The page went through six mockups before anything was built in HighLevel. Changing words in a mockup takes minutes. Changing them in a live page takes longer.
The live page is built from several custom code blocks, one per part of the page, with HighLevel's own elements in between:
- A hero block with a video I recorded on camera, hosted in HighLevel
- HighLevel's Google reviews widget
- The booking calendar
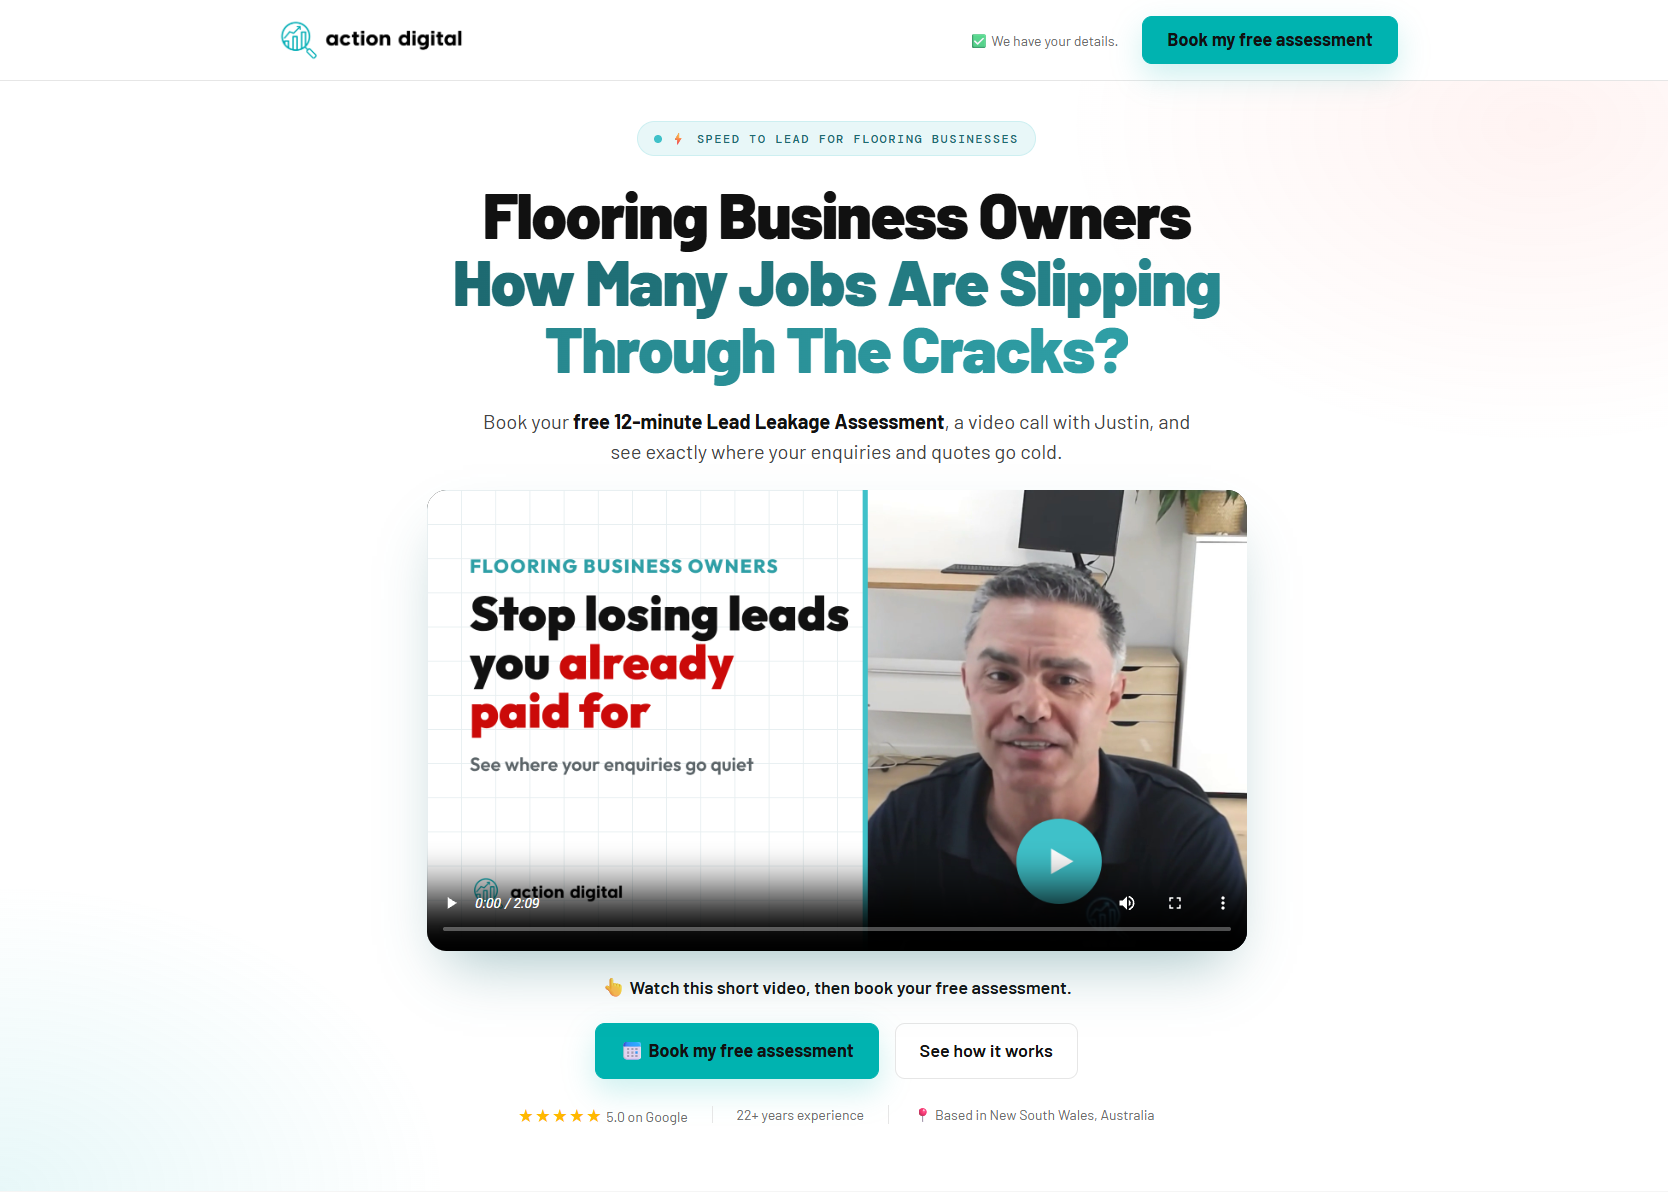
The calendar settings matter more than they look: 12-minute appointments, weekdays only, 3 hours' notice and a 5-day booking window. A short window keeps bookings close, and close bookings are more likely to show up.
Then the small jobs. A thank-you page that uses the person's own details. A privacy link, and a privacy policy that isn't the US template it shipped with. A full pass on mobile.
Step 3: The pipeline and workflows
One pipeline with ten stages, so every lead has a visible place to sit.
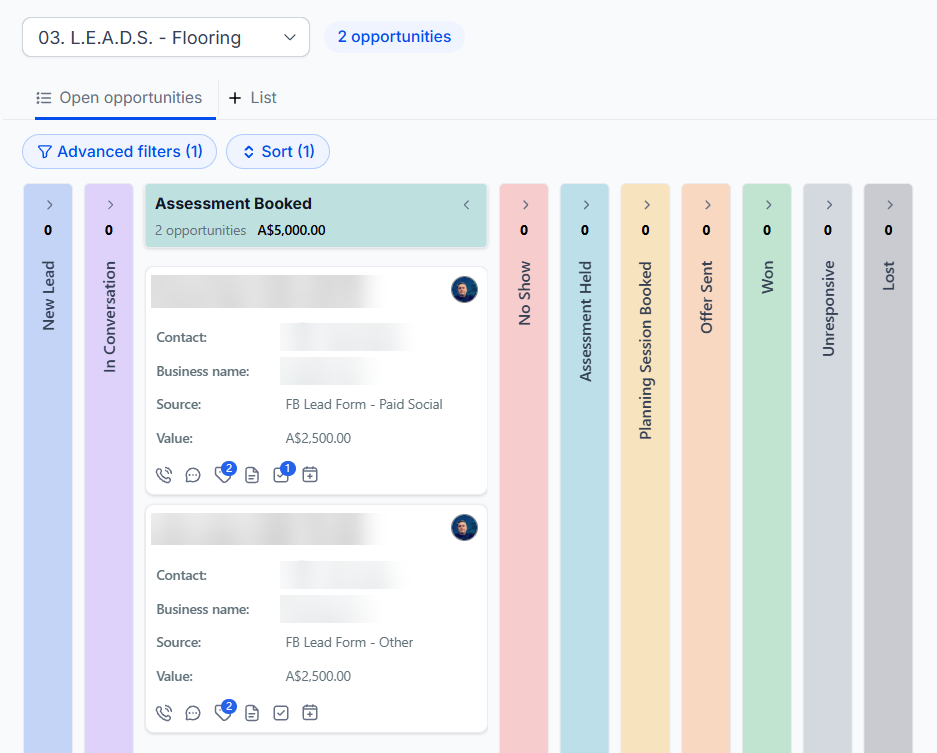
Three workflows do the heavy lifting:
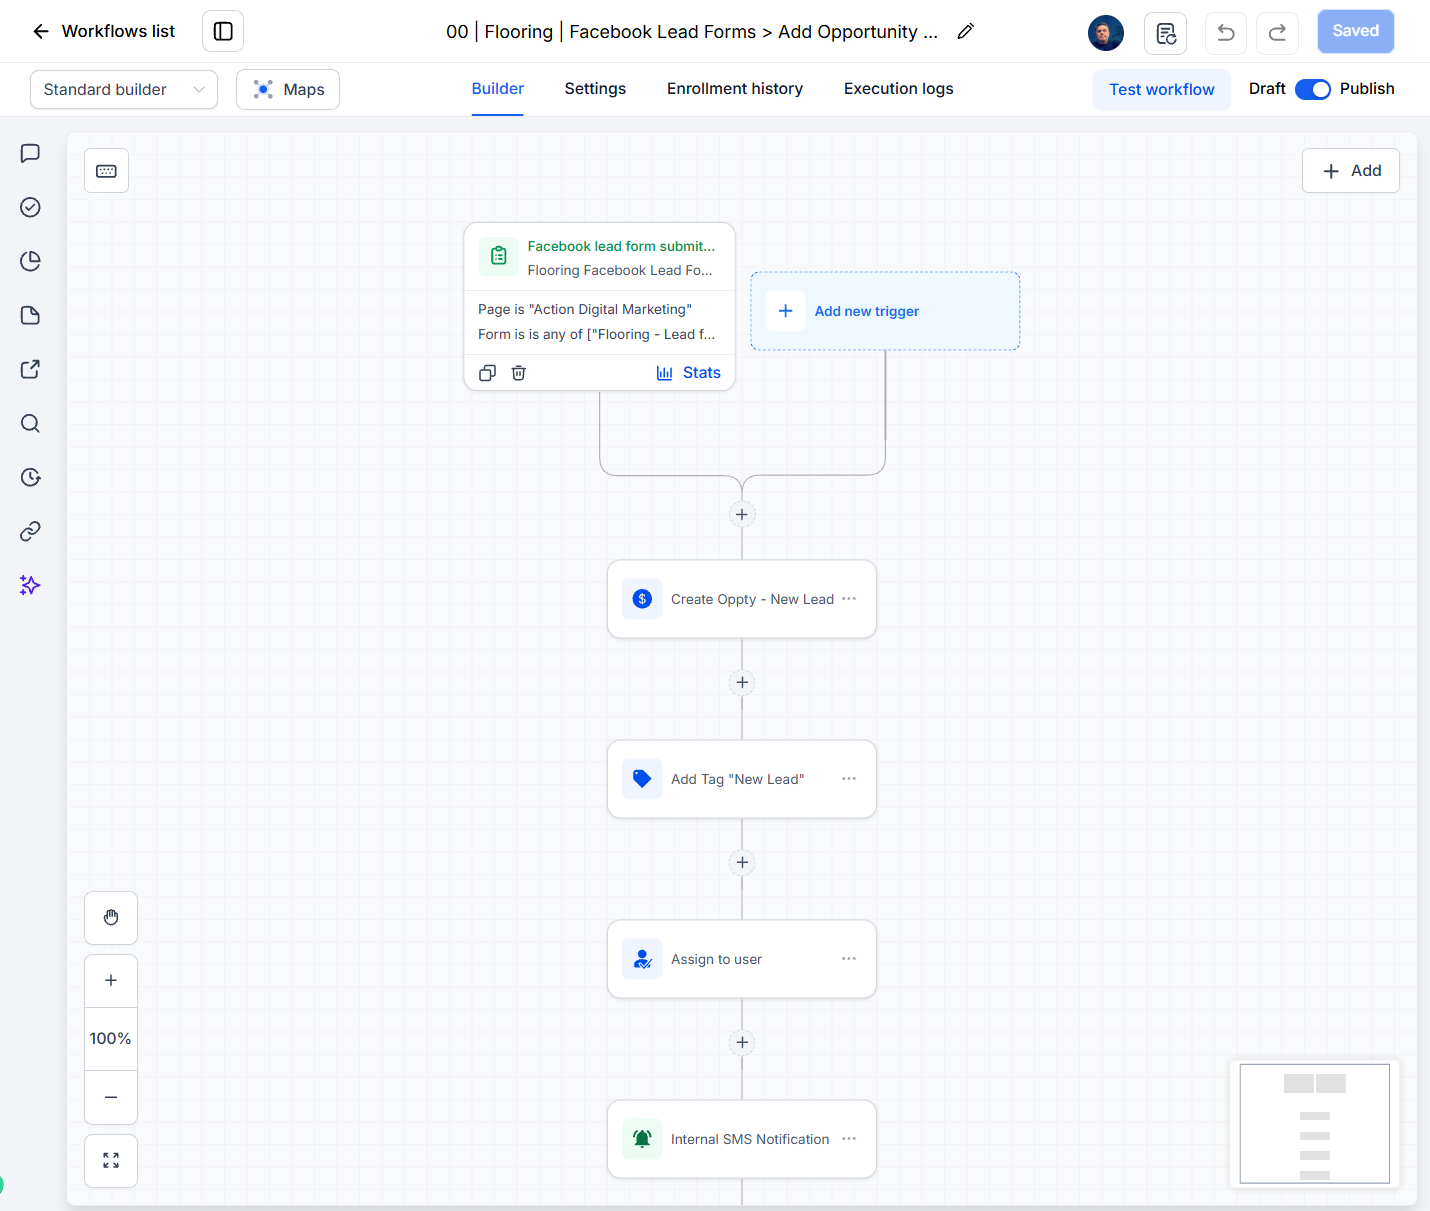
- New lead. The Facebook lead form triggers it. It creates the opportunity, notifies me, and passes the contact to the next workflow.
- New lead intro (AI). Waits 60 seconds, sends a welcome email and an SMS to confirm intent, then follows up if there's no reply. If it times out, it creates a task for me.
- Booking. Sends the confirmation, then reminders at 1 day, 1 hour and 15 minutes. It also pulls the contact out of the intro workflow so they stop getting "book now" messages.
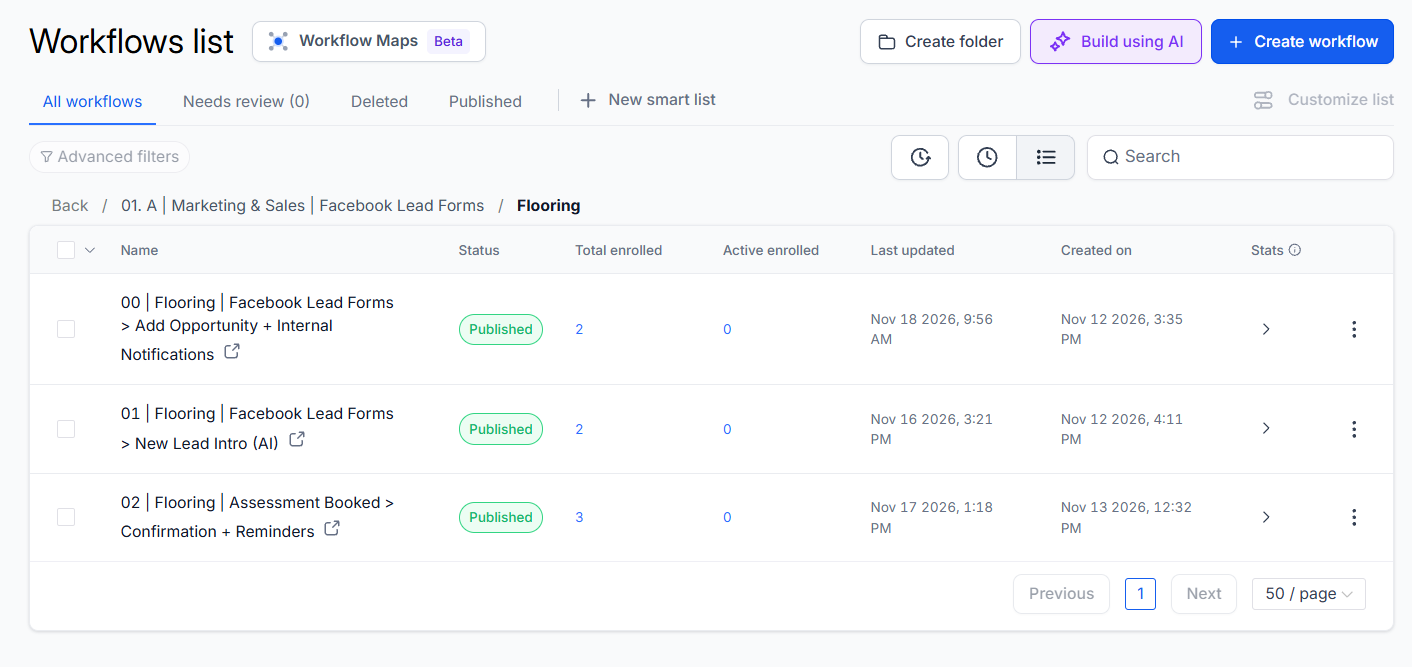
One check that's easy to miss: if you already have a general reminder workflow in the account, make sure it doesn't fire as well. Two reminders for the same call looks sloppy.
This is the part of the build that stops leads going quiet. We covered why it matters in 3 systems to stop losing leads.
Step 4: Emails and SMS
Welcome, confirmation and three reminders. Each was written and approved as plain copy first, mocked up, then built as a HighLevel template.
We still got it wrong once. Two reminder templates ended up with the wrong wording in the slots. We only found it by opening what was live in HighLevel, not by reading our own files.
Step 5: The Conversation AI bot
The bot handles replies to the first SMS. It has a small knowledge base: a background document and three FAQs covering what the assessment is, what happens after it, and pricing.
The pricing rule is the important one. The bot never quotes a price. It deflects once, then hands the conversation to me.
Step 6: The Meta lead form
One question, contact details, a privacy link and a thank-you step.
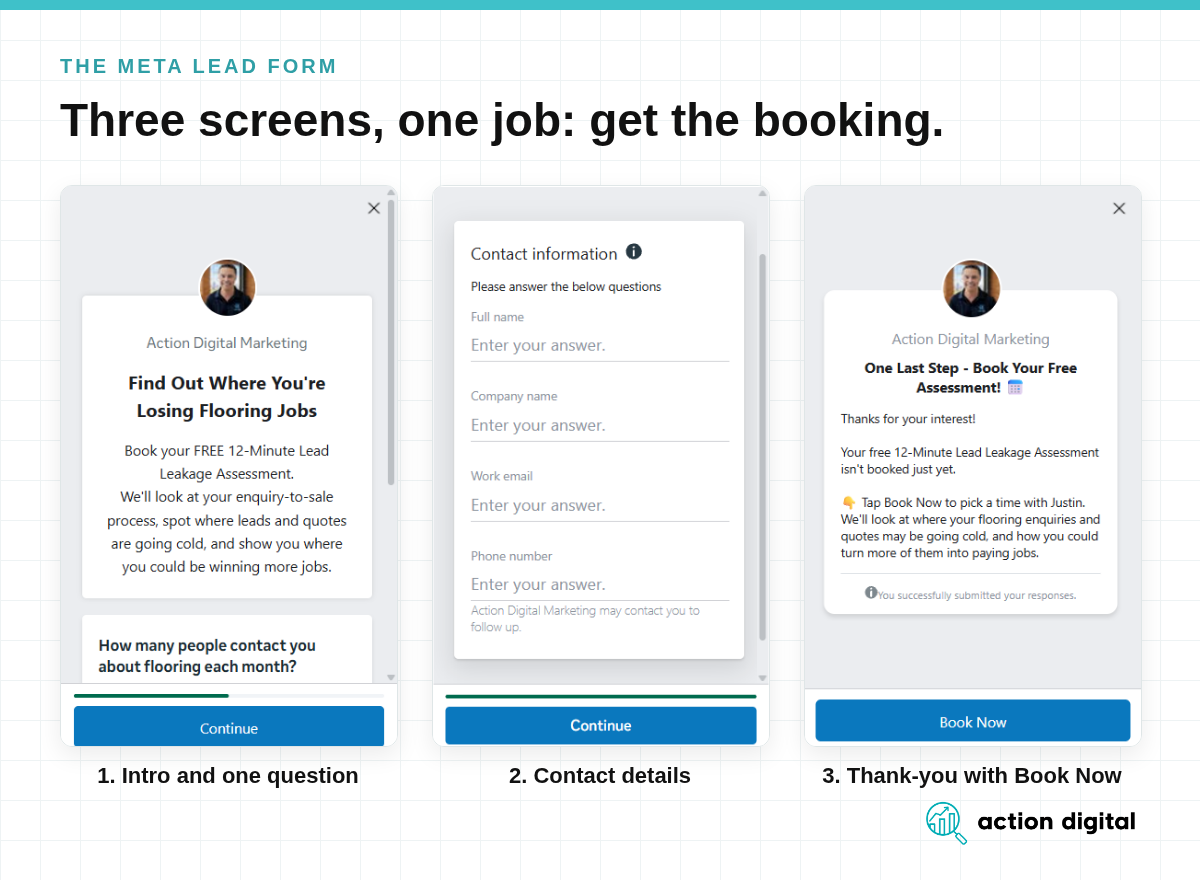
The thank-you step does more than say thanks. It tells the person their assessment isn't booked yet and gives them a Book Now button, so they go straight from the form to the calendar.
Two things to get right:
- Map every field to HighLevel, and match the answer options word for word. HighLevel's guide to creating and mapping a Facebook lead form walks through it.
- Lock the workflow trigger to the Page and the form. Never leave it on "any", or every form on the Page will fire your workflow.
Step 7: The ads
Finally. We studied ads that already work for a similar trade, wrote three versions plus the image copy, and built a custom audience from a list of flooring businesses.
By this point the ads were the easy part. The offer, the page and the follow-up were already written, so the ads only had to point at them. If you want help with this side, here's how we run Meta ads.
Step 8: Testing
We tested three things:
- The lead form, with Meta's Lead Ads Testing Tool
- The bot, inside HighLevel
- A real booking, all the way through confirmation and reminders
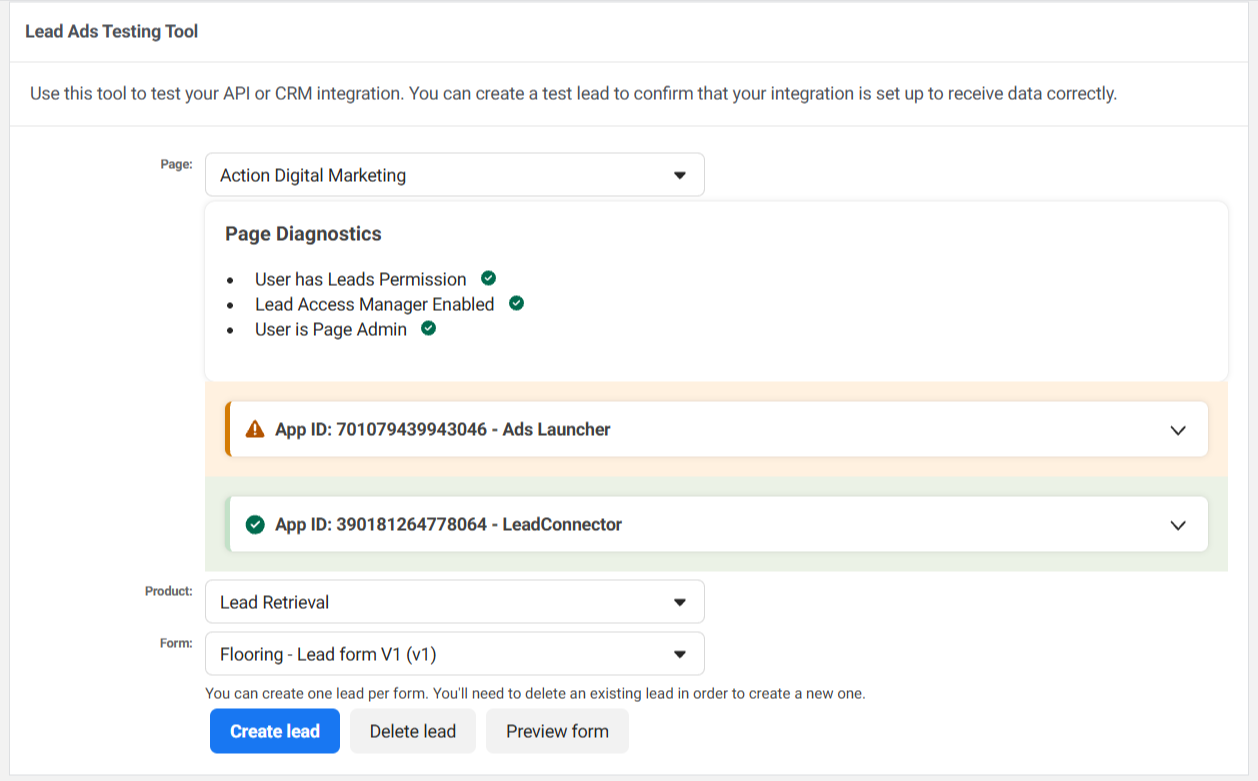
The first lead form test is the one worth telling you about. Meta said the test succeeded. No contact appeared in HighLevel. A green tick on one side told us nothing about the other. We kept at it until the test lead showed up in HighLevel as a contact.
Still on our list: a reschedule and a cancel test.
Step 9: Launch
Publish the three workflows. Turn the ads on. Then watch the first real leads closely, in Meta's Leads Center and in HighLevel, until you trust that the two match.
Three lessons we'd pass on
1. Create the form before the trigger. The trigger can only lock to a form that already exists.
2. Check what's live, not your notes. Your files say what you meant to build. HighLevel shows what you built.
3. A test can pass in Meta and still fail in HighLevel. Always check that the contact arrived, with the right fields, in the right pipeline stage.
Want this built for you?
Nine steps is a lot to fit around running a business. It's also the kind of build we do for clients.
If you'd like to see where your own enquiries are slipping through, book a free 12-minute Lead Leakage Assessment. And if you're weighing up the platform itself, have a look at HighLevel in Australia.


